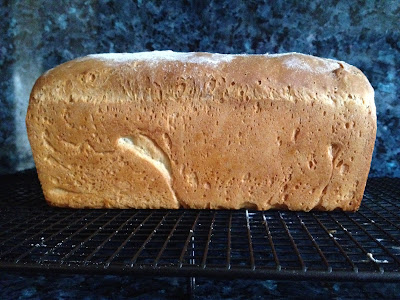
Recipe: Sour cream sandwich bread
I really wish you could all be here to enjoy a slice of freshly baked bread as nothing beats the smell and taste of bread just out of the oven.
But . . . wait, I have discovered a new bread recipe that was SO easy to make . . . you just need a few hours (and most of that time is relaxing reading a book!).
Here is the recipe: http://www.guardian.co.uk/lifeandstyle/2010/oct/02/sour-cream-sandwich-bread-recipe. For those new to bread making - 1 sachet of yeast is 7 grams.
What is amazing about this recipe is the kneading or how little you need to knead! I usually make my bread in the KitchenAid as I am not very good at kneading. No need for any fancy equipment with this recipe. In fact it would be perfect for a older child to make.
1. After blending together the cold sour cream, salt, sugar, yeast, water and flour it all looks pretty messy, but don't panic - roll the dough into a rough ball (below) - it will look like this. I did need to add the tininess bit of extra water as I had lots of loose flour. Rest (covered) for 10 mins.
2. After 10 minutes, lightly oil a board or worktop and knead for 10 seconds (yep, thats right!). Cover and rest for another 10 mins. It will look like this (below). Don't forget to oil the worktop as that oil is very important to the bread and helps with the dough.
3. After the next 10 mins, knead for 10 seconds and cover. You will notice that it is already starting to smooth and become more dough like (below).
4. For the last time (you do this 4 times), knead for 10 seconds - then cover and rest for 1 hour. The dough will almost double in size and become much smoother.
 |
| To keep my dough warm and help with rising I like to warm a wheat pack in the microwave and wrap around the base of my bowl then cover with a tea towel. |
5. Once risen (after the 1 hour), pat dough out to about 2 cm (0.78 inches) and tightly roll (something like below). You don't need to be perfect and no need for a rolling pin.
6. Fold ends under and squish into the tin (looking something like this!). Cover and rest for between 60 to 90 minutes, I did mine for 90 mins and it doubled in size. Sadly no photo (forgot!!), dust with flour and pop in hot oven as per the recipe. I didn't bother lining my tin and the bread came out beautifully.
How easy is that!!
To other bread makers - do you think greek yoghurt would work just as well as sour cream? I can't see why not???
I think I might go and have a slice with homemade mixed berry jam and a cup of tea!!
Here are some other bread recipes by Dan Lepard (including this one) that I might try:


Jo-- your home made bread is beautiful. You are right-- there is nothing like the smell and fast of homemade bread. When I make a loaf-- we almost eat the whole thing!! Toast---- oh I love toast :)
ReplyDeleteXoxo
Vicki
Looks really delicious, Jo! Sounds easy, too - so long as you don't mind getting dough and oil (?) on your hands regularly for the kneading! I think I should get Dolly to try it sometime.
ReplyDeleteThat was the only hassle as I had to wash my hands quite a bit, but it was worth it. It was interesting how it changed and smoothed, at first I didn't think it would which is why I decided to photograph each stage. But it's perfect for a child due to the lack of kneading.
DeleteYes - your photos showing how it changed are rather amazing!!
DeleteWow. That looks lovely. I think I might link to this post and that bread recipe. :-)
ReplyDeleteLooks great! I tried to make an apple loaf on the weekend but it didn't work out too well - i think i either under-kneaded it or the yeast was not good hmmmmm
ReplyDelete